Elswick Hopper restoration project

For discussions about bikes and equipment.
delap
Posts: 38
Joined: 26 Nov 2012, 4:40pm

Elswick Hopper restoration project

Post by delap »

I have acquired an Elswick Hopper delivery cycle which I am looking to restore. It is not in bad nick (lost of pics including those embedded below: https://plus.google.com/u/0/photos/117398976551333886217/albums/6051628833017986641). Wheels need to be rebuilt with new spokes. Major bearings all need a good going over at least. There is a some surface rust and the chrome work is in rather poor condition. I am leaning towards a minimal restoration due to a combination of budget, ability and sympathy with the machine. I would welcome comments and input. Please feel free to treat me like an idiot. I am interested in thoughts in the wider approach to the project as well as tips and gotchas in a restoration project. I have three questions already below.
Image


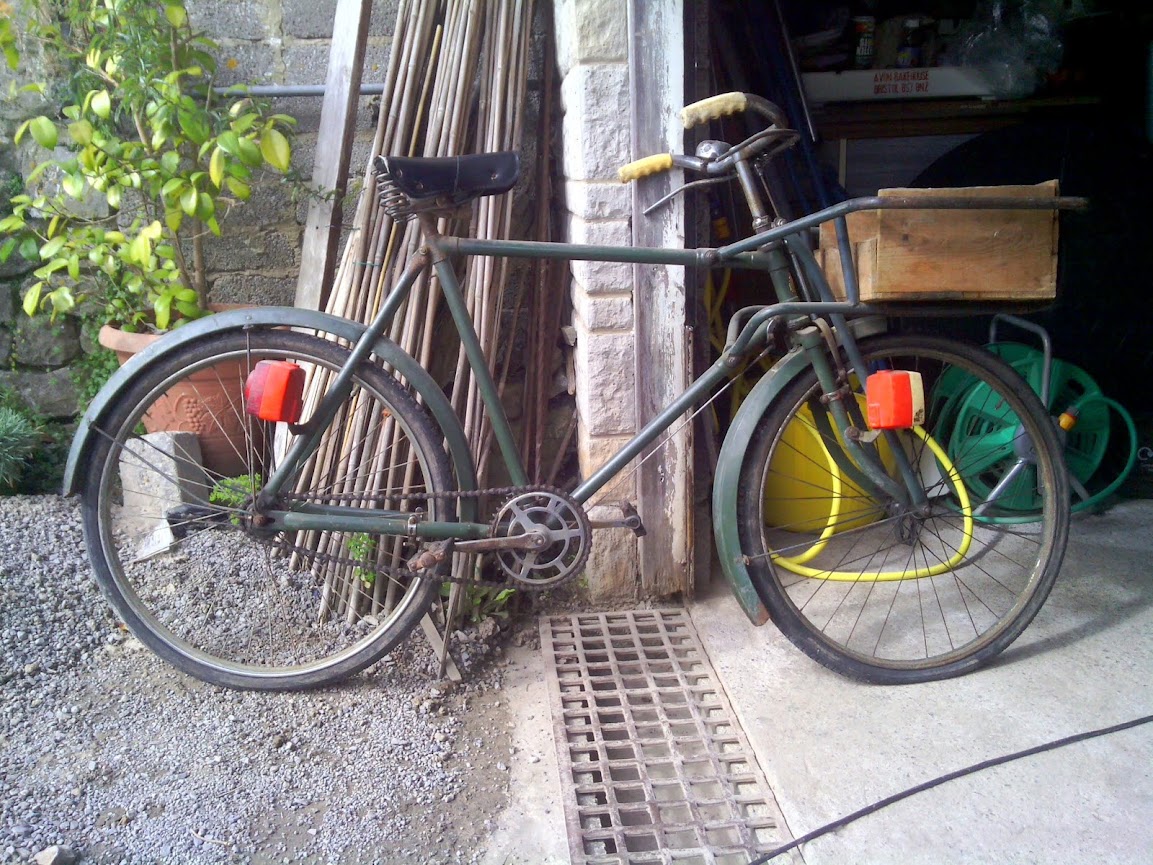
Date: I reckon 1950s based largely on this site: http://oldbike.wordpress.com/1951-elswick-hopper-%E2%80%98model-w%E2%80%99-butchers-bike/. I cannot identify a dating letter (per the linked page) although there appears to be a mark at the top of the seat tube
Image
I would welcome any thoughts.


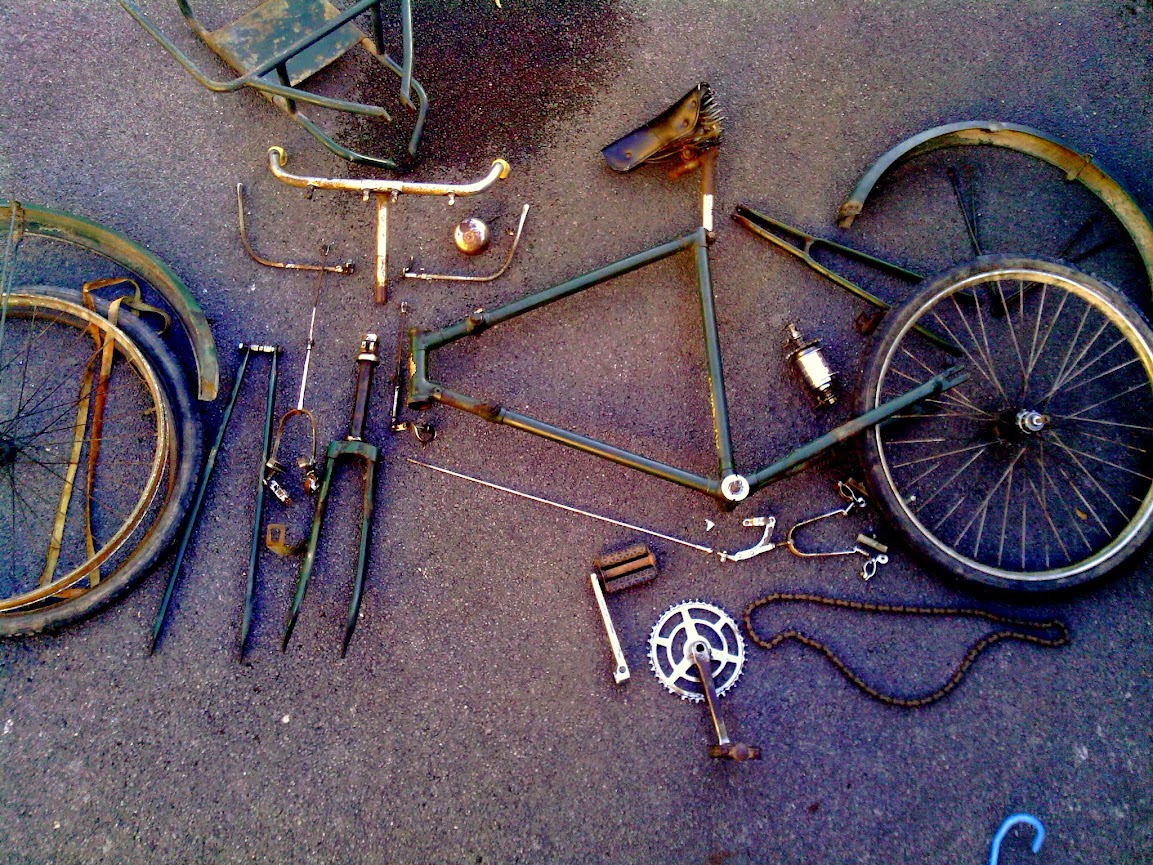
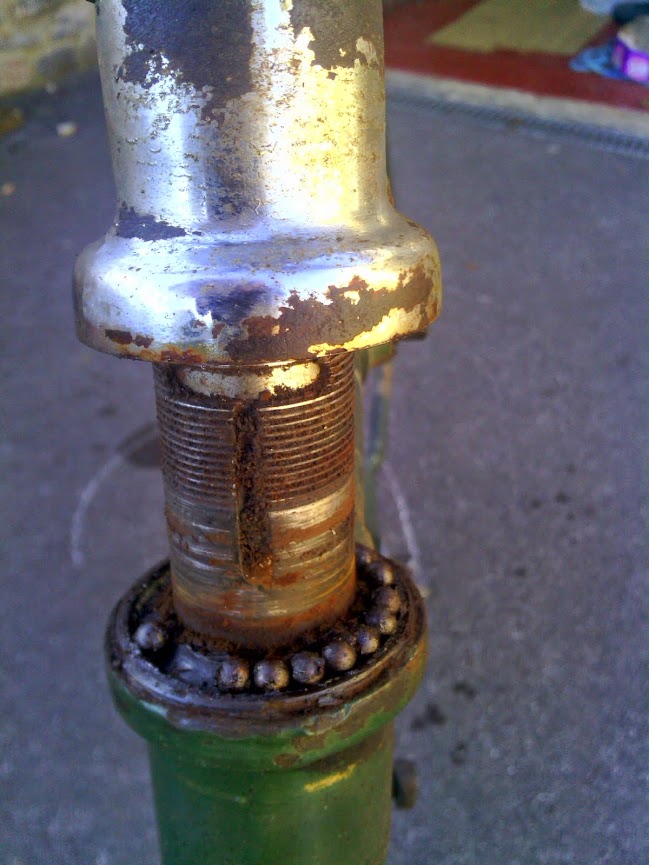
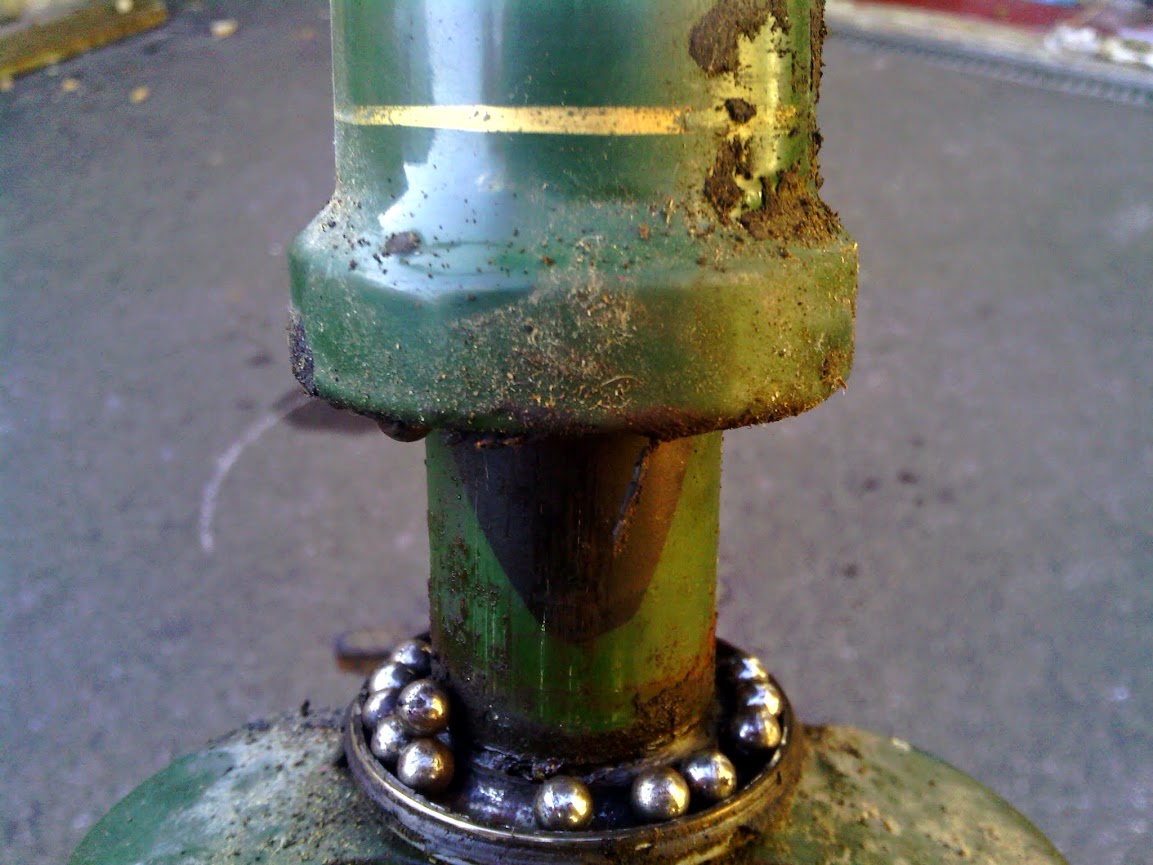
I loosened the seat post bolt enough to remove the post but the nut is now stuck. The bolt has a blind head with some sort of tab fitting a keyway in the seat stay. Any ideas how to shift the nut without further stripping the keyway?
Image


There is surface rust and flakey paint, especially on parts of the seat stays. Any tips for treating this without stripping the whole frame and repainting or going piebald?
e.g.
https://plus.google.com/u/0/photos/117398976551333886217/albums/6051628833017986641/6051629125057136114?pid=6051629125057136114&oid=117398976551333886217
and
https://plus.google.com/u/0/photos/117398976551333886217/albums/6051628833017986641/6051629473930907842?pid=6051629473930907842&oid=117398976551333886217
User avatar
531colin
Posts: 16145
Joined: 4 Dec 2009, 6:56pm
Location: North Yorkshire

Re: Elswick Hopper restoration project

Post by 531colin »

Put a hacksaw blade in the slot in the seat lug and cut the bolt.
If the stem has no expander bolt, then its a head clip type headset.....this may mean its older than you think, or that obsolete parts were used up on this sort of bike......same applies to the chain width.
nicmarsh
Posts: 276
Joined: 14 Sep 2011, 5:12pm
Location: SE UK

Re: Elswick Hopper restoration project

Post by nicmarsh »

wow look at those lights!
Drake
Posts: 1016
Joined: 19 Apr 2012, 9:01am

Re: Elswick Hopper restoration project

Post by Drake »

nicmarsh wrote:wow look at those lights!

Exactly!
What make are they?
Hope you keep us up-to-date on your progress.
Brucey
Posts: 44665
Joined: 4 Jan 2012, 6:25pm

Re: Elswick Hopper restoration project

Post by Brucey »

mechanically speaking most of the moving parts of this bike look to be made to the GPO spec. This spec was used for nearly 50 years which meant that 1929 GPO bikes looked near-as the same as those used in the 1970s; rod brakes, clip headset, welded on rear lamp bracket and all.

However yours isn't a GPO bike; the carrier, the frame mounts for the carrier, the straight top tube, and the fork brace are all different.

I'd suggest a cup brush mounted into an angle grinder to shift the worst of the rust, then treat those areas with a rust killer, then prime and repaint. You may as well repaint fully; there are no decals to worry about. You don't need to strip right back where the paint is sound, just give the surface a key. A brushing enamel paint should give a decent enough finish if you buy the right one.

cheers
-------------------------------------------------------------------------------
~~~~~~~~~~~~~~~~~~~~~~Brucey~~~~~~~~~~~~~~~~~~~~~~~~
thirdcrank
Posts: 36778
Joined: 9 Jan 2007, 2:44pm

Re: Elswick Hopper restoration project

Post by thirdcrank »

Drake wrote:
nicmarsh wrote:wow look at those lights!

Exactly!
What make are they?
....


I'll take a stab at Pifco and obviously much younger than the rest of the bike - 1970's?
User avatar
timdownieuk
Posts: 223
Joined: 25 Jul 2014, 12:05pm

Re: Elswick Hopper restoration project

Post by timdownieuk »

Brucey wrote:mechanically speaking most of the moving parts of this bike look to be made to the GPO spec. This spec was used for nearly 50 years which meant that 1929 GPO bikes looked near-as the same as those used in the 1970s; rod brakes, clip headset, welded on rear lamp bracket and all.

However yours isn't a GPO bike; the carrier, the frame mounts for the carrier, the straight top tube, and the fork brace are all different.

I'd suggest a cup brush mounted into an angle grinder to shift the worst of the rust, then treat those areas with a rust killer, then prime and repaint. You may as well repaint fully; there are no decals to worry about. You don't need to strip right back where the paint is sound, just give the surface a key. A brushing enamel paint should give a decent enough finish if you buy the right one.

cheers


I think you missed some of the photos. There are decals.

https://plus.google.com/u/0/app/basic/p ... 3017986641
Last edited by timdownieuk on 28 Aug 2014, 8:37pm, edited 1 time in total.
nicmarsh
Posts: 276
Joined: 14 Sep 2011, 5:12pm
Location: SE UK

Re: Elswick Hopper restoration project

Post by nicmarsh »

If mine I would leave paint as is, original
Brucey
Posts: 44665
Joined: 4 Jan 2012, 6:25pm

Re: Elswick Hopper restoration project

Post by Brucey »

timdownieuk wrote:
I think you missed some of the photos. There are decals.


I did and there are, but I'm far from convinced that they are worth keeping; I guess it all depends on what the OP wants to do. The OE paint job looks terrible both in nature and condition; there doesn't appear to be any primer or anti-rust treatment there. If the OP does decide to replace the transfers.... then the seat tube transfer isn't exactly a toughie and the mudguard one can be bought from H Lloyd I think.

If the OP is after a cheap fix then matching that shade of green might not be too difficult provided it hasn't faded too badly. There are companies like this one;

http://www.craftmasterpaints.co.uk/products.htm

which do 'old style' paints and colours.

cheers
-------------------------------------------------------------------------------
~~~~~~~~~~~~~~~~~~~~~~Brucey~~~~~~~~~~~~~~~~~~~~~~~~
delap
Posts: 38
Joined: 26 Nov 2012, 4:40pm

Re: Elswick Hopper restoration project

Post by delap »

Yup, the lights are Pifcos. I haven't tried them as I feel no great love for them.

I came to the same conclusion on the stem bolt 531colin but there is plenty left that will come apart more easily to be getting on with first. Most other fixings have come apart without too much grief. It seems to have been kept greased and lubed (although mostly dried out now).

I will think on on the paint question while I continue to disassemble and see if there are any hidden horrors before I get too obsessive about details. The rear hub has a circlip (un)covered lubrication hole so will have to see what condition the bearings are in. The freewheel needs a two tooth removal tool so I may see if the LBS will remove it for me. Is it likely that the freewheel would be easily replaceable if needs be or will it be a a nightmare of matching threads and differing standards? (ie is it going to be simpler to use the park tools destructive removal method?

I will update progress but am working away for the next four weeks at least so maybe not quickly...

thanks so far.
tim-b
Posts: 2104
Joined: 10 Oct 2009, 8:20am

Re: Elswick Hopper restoration project

Post by tim-b »

Hi

Re: the freewheel, unless there's a problem with it (or the spokes behind) I'd clean and regrease for the sake of originality

Partially use the Park Tools destructive method (referred to above) with a cloth below to catch stray balls. Carefully remove the sprocket from the body in case the pawls and springs make a bid for freedom (a cloth draped over might help here too)

Clean everything, you should be able to buy balls at your LBS (if necessary), grease the bearing groove and the balls should stick in place. Add one ball fewer rather than one too many
Only give the pawls and springs the lightest smear of grease possible or they'll stick leaving you without drive

Reassemble. The pawls can be a problem, Sheldon Brown suggests using an elastic band...http://sheldonbrown.com/freewheels.html#disassembly

Regards
tim-b
~~~~¯\(ツ)/¯~~~~
Brucey
Posts: 44665
Joined: 4 Jan 2012, 6:25pm

Re: Elswick Hopper restoration project

Post by Brucey »

re the freewheel thread; most likely it is a standard BSC thread on the hub (which is also the same as a standard left side BB cup thread). New freewheels are not too difficult to find although carrier cycles often have large ones which are a bit more difficult to track down in the proper wide size. New freewheels are usually made in far away places these days; they are OK I guess but they are not that well made, e.g. they need to be reshimmed from new in most cases.

BTW if there is the slightest problem with the rear hub or freewheel I would without hesitation slot an old (period correct) SA thee speed in there, (provided the OLN measurement of the frame is suitable). This will make the bike a lot easier if it is hilly where you are, and would almost certainly have been an option when new.

If you rebuild the wheels you have a dilemma; originality or quality? The original spokes would have been galvanised or even painted, but stainless steel ones (and spoke washers probably) would be a better choice.

cheers
-------------------------------------------------------------------------------
~~~~~~~~~~~~~~~~~~~~~~Brucey~~~~~~~~~~~~~~~~~~~~~~~~
delap
Posts: 38
Joined: 26 Nov 2012, 4:40pm

Re: Elswick Hopper restoration project

Post by delap »

There are a few spokes broken or absent and the remaining ones are quite corroded so I am assuming a wheel rebuild. My nod to period correctness will probably be limited to trying to get some fairly heavy gauge spokes. I can paint them if they look too shiny. There is some space behind the free-wheel but not enough to thread spokes I wouldn't have thought so I will try careful disassembly and then see if the inner body will come off.

The chain is half-inch pitch (roller to roller). I measured the sprocket width as 1/8" but now I need to check the chain as I had guessed incorrectly that the sprocket tooth width would be what I was looking for as Sheldon seems to suggest 3/16" would be likely and it is certainly wider than a typical modern SS or track bike.

I like the idea of a three speed hub if I can find one fairly cheap but I suspect that cheap may conflict with period and attractive (like those nice brass faced shifters). Any tips on what model to look out for (mid century, widley available) and would it mean switching to a lighter chain?
delap
Posts: 38
Joined: 26 Nov 2012, 4:40pm

Re: Elswick Hopper restoration project

Post by delap »

After stripping the bike down to the ground and buying a AW3 hub and new rim I am finally starting to reassemble the bike. (I had the BB out and disassembled and respoked the front wheel after this photo)

Image

I am a few balls short for the top headset race and I wondered if anybody could suggest the likely size.

The top race has smaller balls
Image

than the bottom race
Image

Is there a likely size or do I just need to try and measure them?

On the subject of chain-line, am I right in guessing that with a 3/16 chain and 1/8 sprocket on the AW3 hub and given that the bike is never going to do significant miles, that chainline really isn't too critical and I can go ahead and build an undished rear wheel or is it worth measuring?

TIA
The fat commuter
Posts: 292
Joined: 12 May 2014, 7:54pm
Location: The hilly side of Sheffield

Re: Elswick Hopper restoration project

Post by The fat commuter »

My dad has (if he's still got it) an Elswick Hopper bike. Looks completely different to yours though. I think that my dad's may be a lot more 'modern' though - I can remember him buying it sometime in the 1970's.
Post Reply